"Normal Mode" Export Pricing
The page that will be displayed consists of five sections and is the main location for controlling the decisions that Energy Manager will make:
- Spike Preparation and Buy Pricing
- Normal Mode
- High Sell Mode
- Sell-Buy Mode
- Weather Settings
Details of the Normal Mode section and how to configure it are detailed in this section.
Normal Mode
The second section, as below, allows you to set the sell price at which you want to export your power, at the associated battery SoC (state-of-charge) level.
If you find that your electricity gets exported too easily, or you need to reserve more for yourself, you can adjust this here. This is a very important part of Energy Manager to understand as it is what it checks before it decides to sell your electricity.
How to read the settings:
The battery part of the diagram represents the state-of-charge of your home battery (or combined battery stacks). The battery has been divided into 6 sections. Each of these sections is definable. Alongside the battery are six corresponding prices. These are the sell prices that relate directly to the state-of-charge in the battery on the left. Basically it is the price that you are willing to let your power be sold at, if the battery had decreased to the corresponding level. For example, if your battery was between 40-49% charged, Energy Manager would export your power IF the sell price was over $1/kWh. If the price was under, nothing would happen - you would continue using your battery as normal. If your battery was more charged than 49%, for example 70%, it will still let the power be exported as the price exceeded the price you had put against the higher capacity values, in this case 30c/kWh.
If you have a smaller battery and your stored electricity is precious, you might want to increase the amount that you are willing for your electricity to be sold at or else you may not have enough for your own use.
Remember that generally it is better to sell high and buy, even if you've exported all your battery, at a lower price. If the export price is say $3/kWh but the buy price will be 20c/kWh during the night, it would be better to allow your power to be exported at the $3/kWh and then buy again at 20c/kWh. A caveat to this would be that you do not want to exhaust all your stored energy before the price spike has completed, because if you do, you will have to take from the grid at the spike pricing. So, if a long spike is occuring, watch your battery. In this situation it may be beneficial to use the High Sell Mode instead of this Normal Mode (see later).
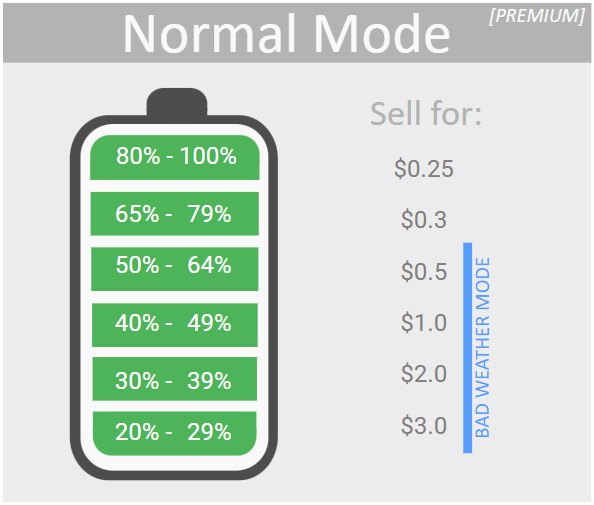
- Battery - you can define your own six battery divisions and associated sell prices. Simply click on the percentage in the left column and enter the division breaks.
- Sell for - these prices are definable (just click on them) and have a 1:1 relationship with the battery division adjacent to it.
- Bad Weather Mode - Bad weather mode isn't configured here, but it shows you that if bad weather mode is enabled, then the top two divisions of the battery are ignored. This means that if bad weather mode is active, your system would only ever export if the sell price was 50c/kWh or greater. This potentially keeps some charge for your use since the weather is not considered favourable for solar generation and you may need to use it yourself, but you'd still let it go for a higher export price.
Please note that bad weather mode pricing is based around the selling brackets, not the battery levels. The battery levels are still taken into consideration, but in the example above power would only be exported if the sell price of $0.50 was met. It would still export if the battery was 100% full, it just won't sell at any price under $0.50 (these settings are all configurable).
Bad weather mode is configured in the last section "Weather Dependent Discharge Settings"
Example:
In this example I want to change the 3rd range up from the bottom from 40-49% to be 45-49%, and set the sell price for this bracket as 55c.
Click on the "40%" and a settings window will appear.
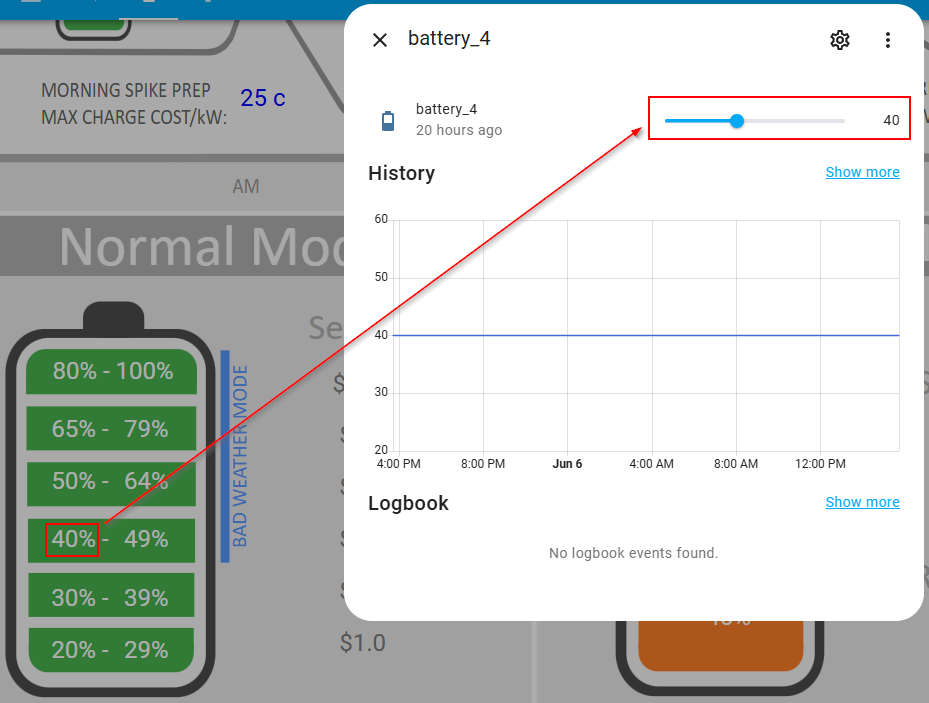
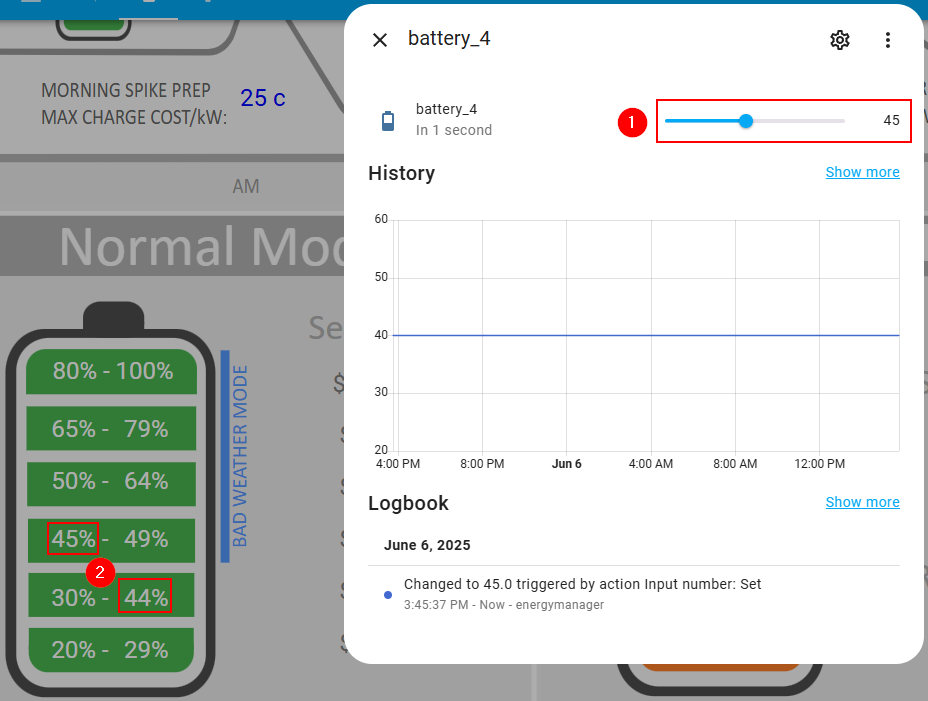
Once the settings window appears, move the slider to 45 (for 45%).
Once you have adjusted the value, the battery diagram will be updated automatically (below) - both the limit is changed (1) and the range directly below it, since this change also impacts it (2).
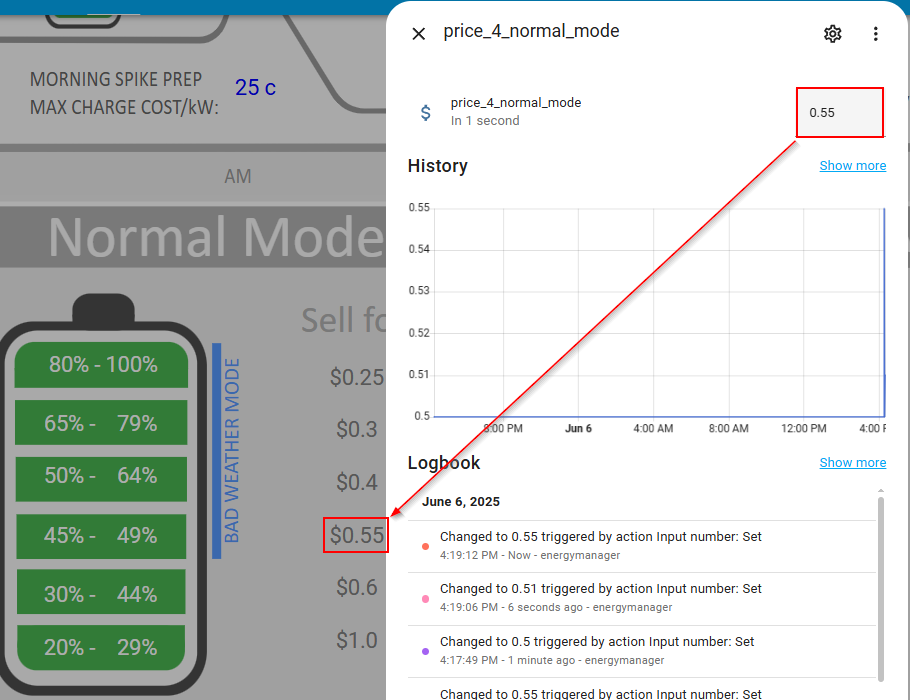
Now, we also want to change the sell price for that division from 50c to 55c. Click on the sell price of 50c and a settings window will appear.
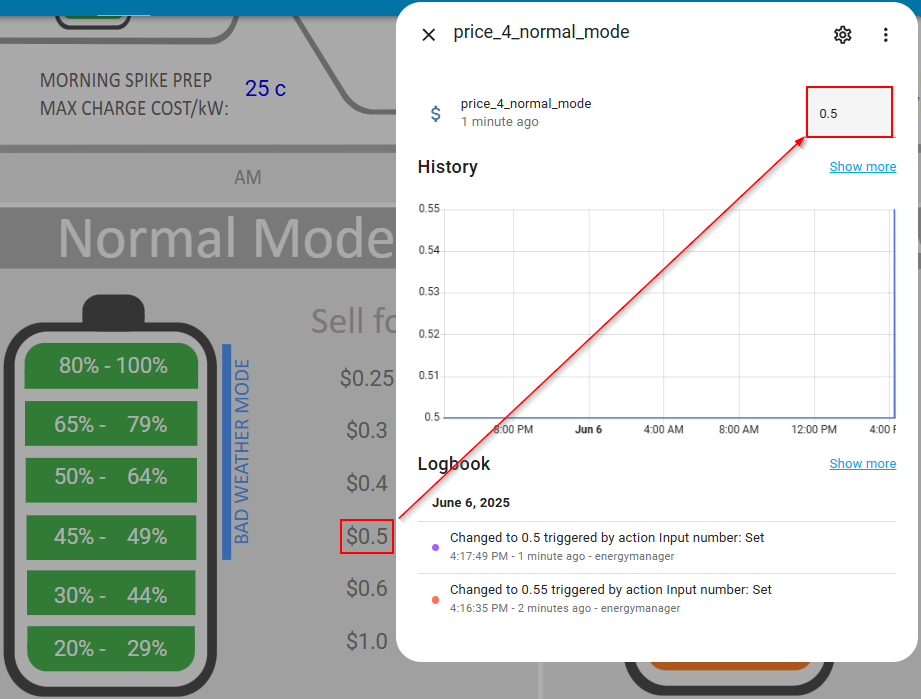
Once we enter the new sell price, in this case 55c, it will update the diagram.
You can continue doing this for each division so that your sell profile suits your own personal requirements.
You can go directly to the other sections of this configuration page below:
↩ Spike Preparation and Buy Pricing
➜ Weather Dependent Discharge Settings