Modbus
Modbus Configuration
Modbus is the protocol that Home Assistant and Energy Manager will use to access your inverter. It is important that this is configured correctly. Since Modbus is started very early in the Home Assistant startup process, it must obtain some settings from the /config/secrets.yaml file, and not from other entities within Home Assistant.
- On the left menu, select Studio Code Server

- Click Yes, I trust the authors so you can use the add-on (this is because this tool is very powerful, so only do what these instructions say)
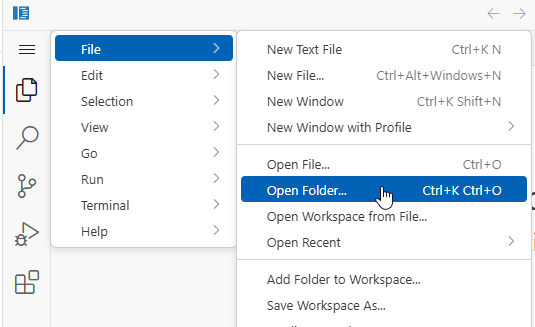
- From the top left menu of Studio Code Server, click on the three horizontal lines, then File > Open Folder
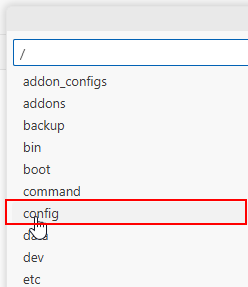
- From the Open Folder, select config, and then OK
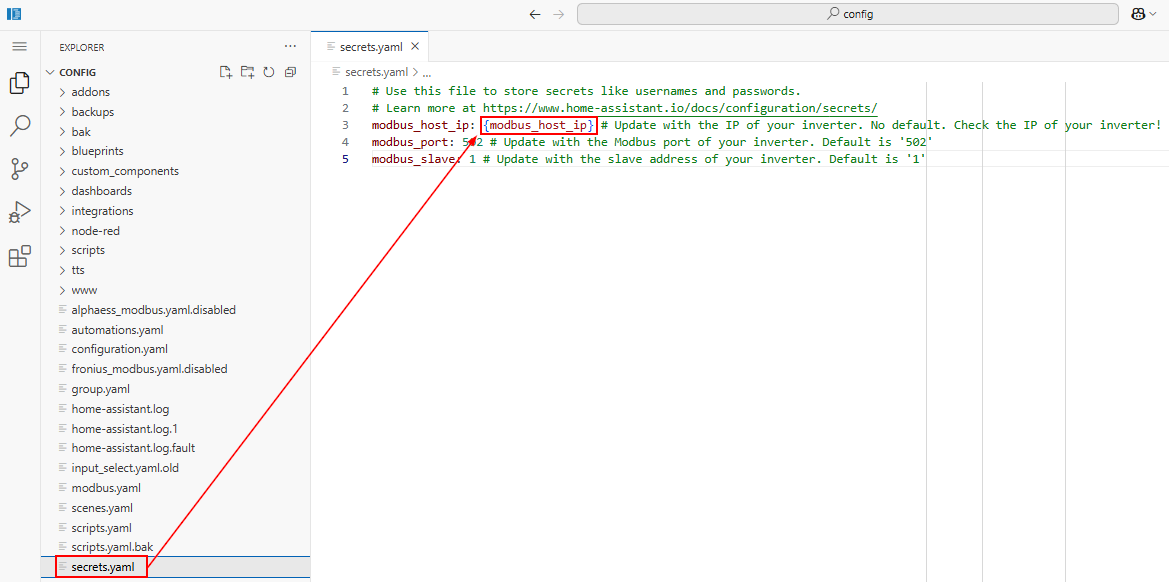
- Select the secrets.yaml file and then on the right side of Studio Code Server edit the contents of this file. You will need to change the {modbus_host_ip} to the IP address of your inverter. If the IP address of your inverter is 10.10.10.5, then enter this address. Do not include the {} brackets. You may need to change the modbus_port and modbus_slave entries as well, but try it with these default settings first.
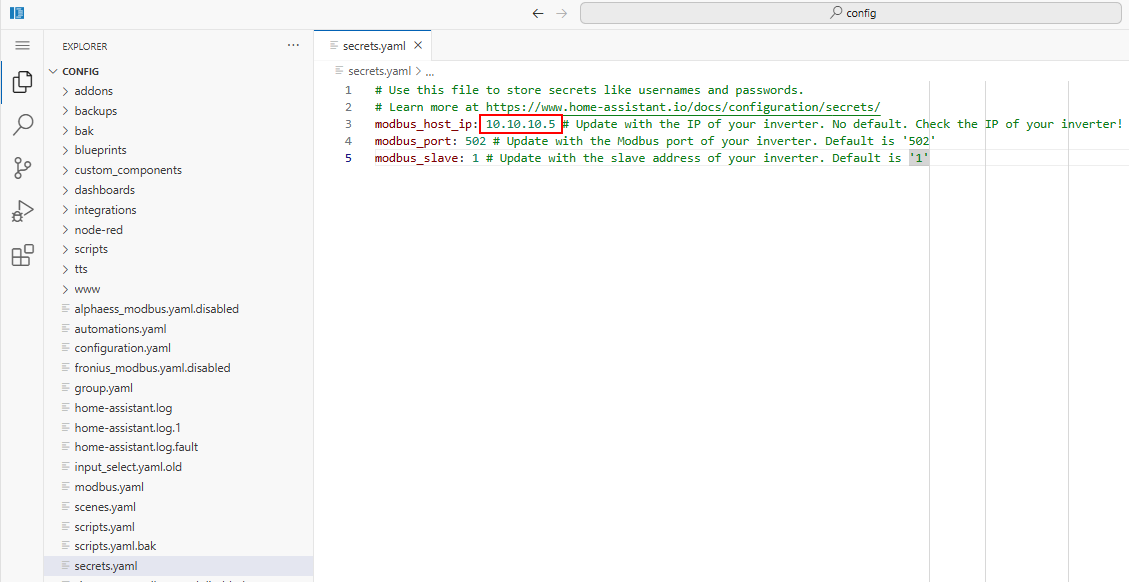
- If your IP address was 10.10.10.5, then the file contents will look like this (but it is extremely unlikely this will be your address; you MUST find it yourself).
Note - You don't need to actually press save; the file is updated the moment you edit it, but you will need to restart Home Assistant for the settings to take effect.
If you are using an AlphaESS inverter, you should also update the modbus_slave from 1 to 85.
If you are using a GoodWe EH/ET/ESA inverter, you should also update the modbus_slave from 1 to 247.
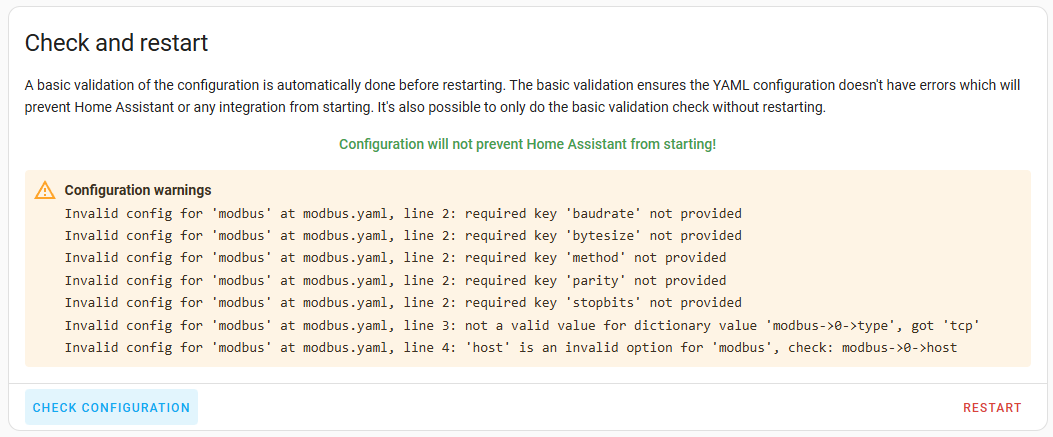
For the Modbus integration to start working, you must restart Home Assistant. Please do that before continuing with your configuration. The recommendation is to perform this through Developer Tools > Check Configuration > Restart so you can see if there are any errors that may prevent Home Assistant from restarting.
The following modbus warnings are ok if you have not rebooted your Home Assistant since you updated the secrets.yaml file. The modifications to your secrets.yaml file have not been loaded yet, so modbus will issue warnings.
Support for multiple PV sources (optional)
If you have multiple PV sources, or you are using an A/C coupled system where the solar is taken from another inverter that isn't directly part of the battery system you have, you may need to configure Home Assistant to obtain the PV generation values from an extra source.
Instructions
1) Install the appropriate non-Energy Manager integration (never install a 3rd-party integration for your main device, except for GoodWe, but you will need to for additional sources).
2) Find the appropriate entity that displays the current PV generation (in Watts) for your additional PV sources. Energy Manager will support up to three additional sources.
3) Paste the following content into your /config/template.yaml file (note, this is NOT the Energy Manager em_templates.yaml file). What you place in /config/template.yaml will be retained over EM updates.
    - name: "Additional PV Power"
      unique_id: em_additional_pv_power_total
      unit_of_measurement: W
      device_class: power
      state_class: measurement
      state: >
        {% set p1 = states('sensor.SECONDARY_PV_POWER_1') | float(0) %}
        {% set p2 = states('sensor.SECONDARY_PV_POWER_2') | float(0) %}
        {% set p3 = states('sensor.SECONDARY_PV_POWER_3') | float(0) %}
        {{ (p1 + p2 + p3) | round(0) }}
Important: Make sure that the indents are identical to above, so the "- name:" of the first line contains exactly 4 spaces.
4) Replace sensor.SECONDARY_PV_POWER_1 with name of the additional PV generation sensor. Keep everything else in the line the same.
5) Repeat up to two more times for sensor.SECONDARY_PV_POWER_2 and 3, if needed. If you don't have more than one additional PV source, just leave the additional lines exactly how they are. Don't delete them, don't change them.
6) Remove the [] from line 4 of the original configuration.yaml file (not shown above) i.e., the line should read - sensor: without the []
7) Restart Home Assistant
8) Check your PV generation to confirm that the additional sources are now recognised and added to any other existing PV generation total.