HACS
Authorise Home Assistant Community Store
Now that we have Home Assistant installed with the Energy Manager backup restored to it, we need to log into it and customise certain parts of it to make it unique to you.
Instructions
Install and Authorise HACS
- Click Settings from the bottom of the left menu
- On the next screen, select Devices & services

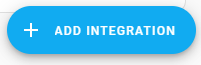
- Click on + ADD INTEGRATION down the bottom right of the screen
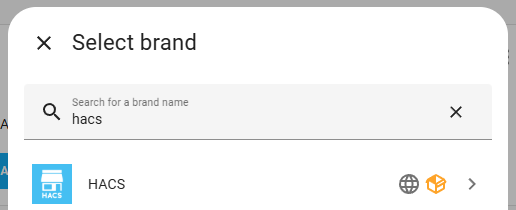
- Search for HACS and then select it. Tick all the boxes that are presented to you and then press Submit.
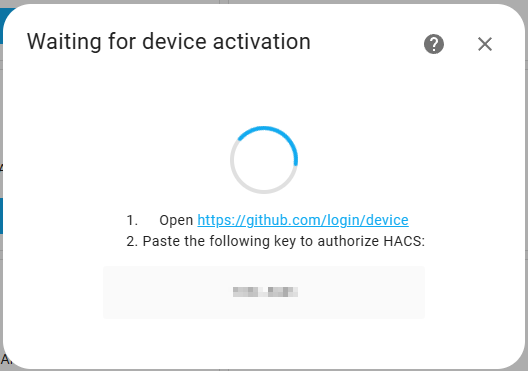
- You will be presented with a Waiting for device activation box. Do what it says and browse to https://github.com/login/device and paste the key that is shown to you. If you do not have a GitHub account, you will need to create one for free. It is the only way that HACS will be installed and HACS is a fundamental component of Home Assistant.
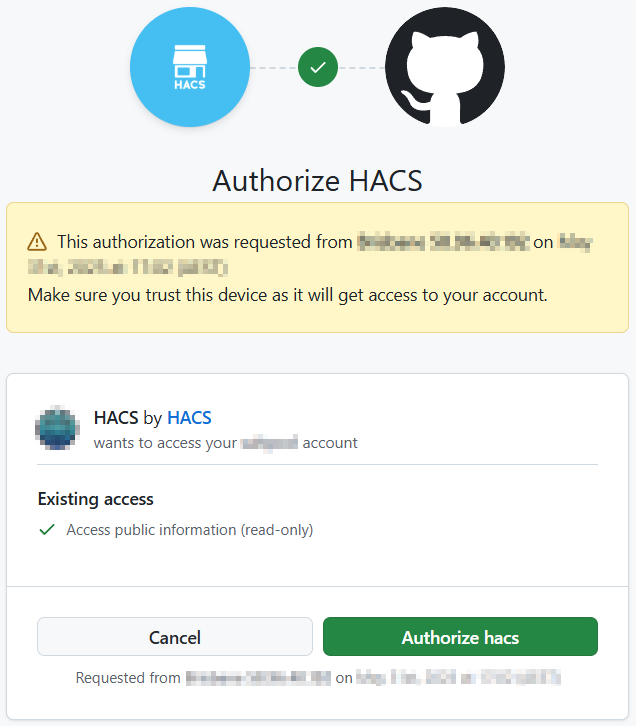
- When asked to Authorise hacs, continue and authorise it.
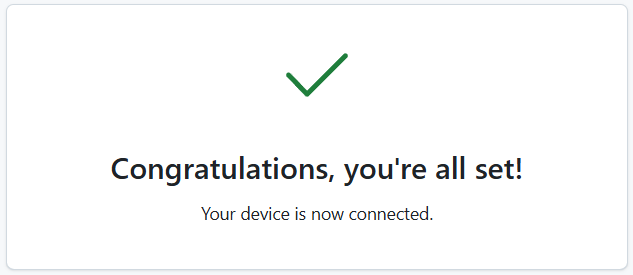
- You should receive a confirmation message. You can close this browser tab and return to your Home Assistant page.
- When you are presented with a list of HACS components that are already part of the Energy Manager configuration, you can just select Skip and Finish

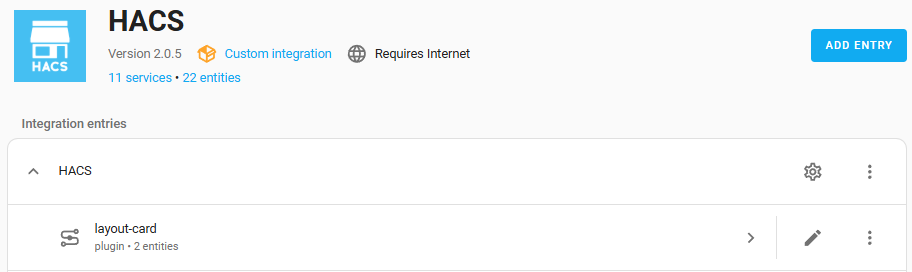
- You should now see that you have 11 services and 22 entries in HACS.
Redownload Tabbed Card
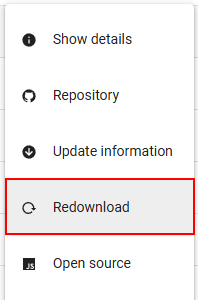
The HACS component called Tabbed Card requires a redownload after the image restore (potential bug in the Tabbed Card component).
From the side menu, click on HACS and then locate, from the list of components installed, the Tabbed Card item.

Click on the three dots to the very right of the page and then select Redownload.
Keep the defaults for the version to redownload.
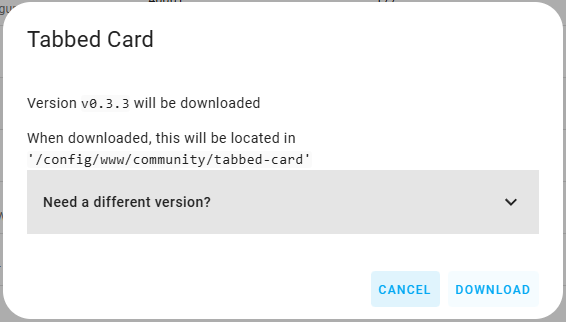
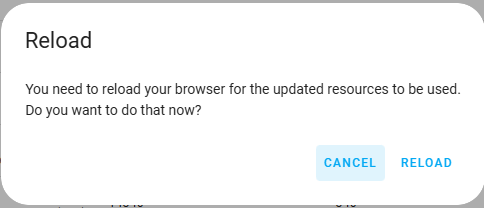
When prompted, select Reload.
Goodwe owners (only)
The following is only required for Goodwe inverter owners, do not install for any others brands.
For all other brands, proceed to the next step - Modbus Configuration.
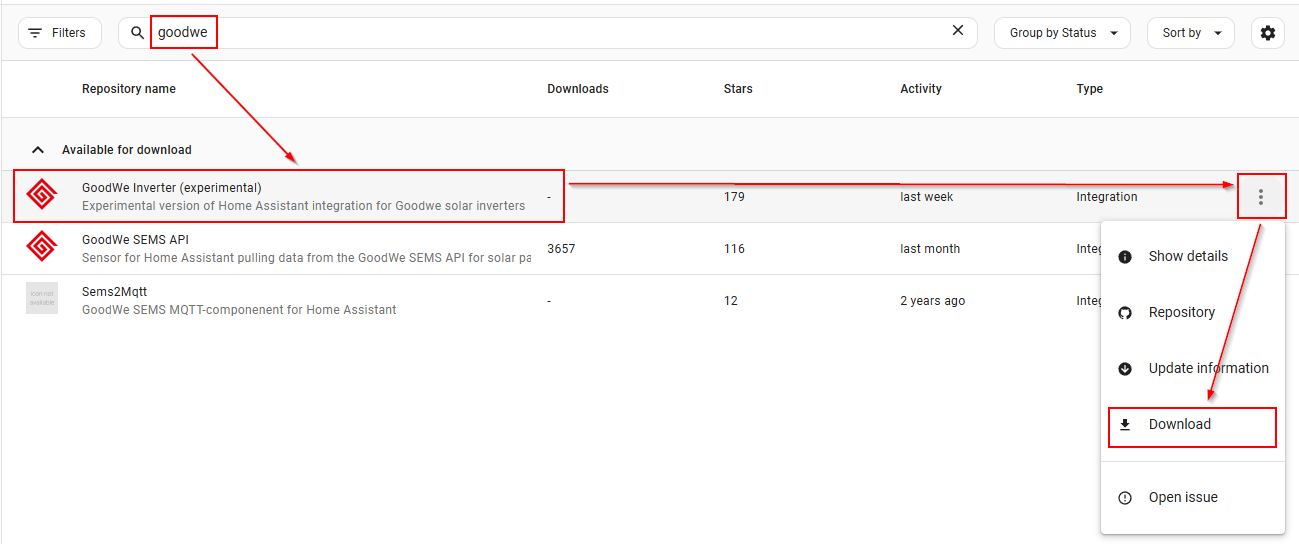
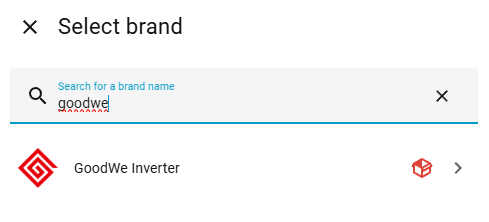
From within HACS, search for goodwe and then select the GoodWe Inverter (experimental) integration, click the 3-dot menu and select Download:
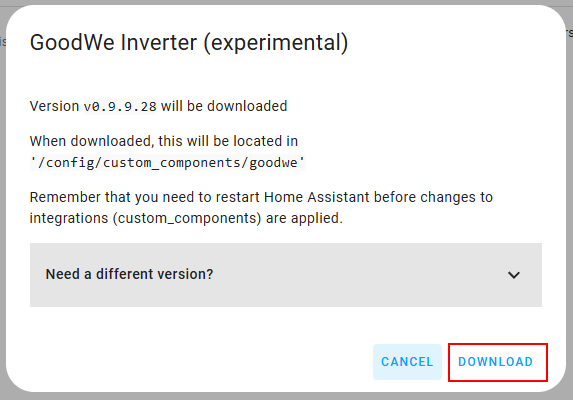
Select the Need a different version? box and select version 0.9.9.28 (Important - Do not select any other version). Then select Download.
Restart your Home Assistant after the HACS based integration has completed.
Once your Home Assistant has restarted, browse Settings -> Devices & services -> Integrations and then select + Add integration (bottom right).
Search for the GoodWe Inverter integration and select it.
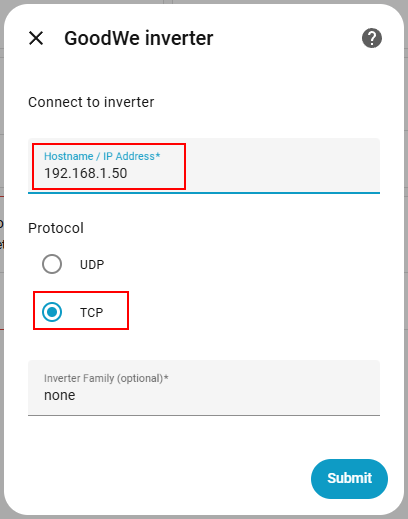
When asked, enter in the IP of your GoodWe inverter, select TCP, and press Submit. Note, it is unlikely that the IP address in the screenshot is the same as your inverter IP, so you will need to locate its IP address and enter it here.
When asked for the name of your system, ensure it is simply Goodwe. Do not use Goodwe battery inverter as this will break the automations. It must be Goodwe.
Once complete, this will install the GoodWe integration and will create some sensors that Energy Manager will use. Energy Manager will also use modbus for some entities that this integration does not expose.