Your Energy Settings
Configure the PV Dashboard
The PV dashboard contains settings that are unique to your setup. This is where your API keys are saved, and particulars of your solar setup are detailed.
- Click on the PV item in the menu on the left
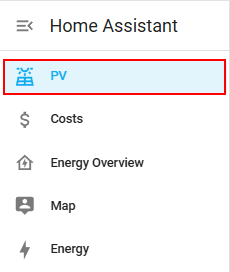
- Then click on the Cog icon on the top of the dashboard

Your Energy Setup
Select your inverter brand from the System Configuration drop-down box. Restart Home Assistant when notified and return back to this page again to continue with your configuring the settings specific to your system.
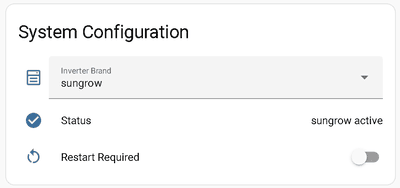
You have a choice of three GoodWe options - goodwe, goodwe_et and goodwe_int.
The strongest recommendation is for you to use goodwe_int as this does not rely on GoodWe modbus, which has been proven to be unreliable with potential configuration changes on firmware updates. So start off using goodwe_int and only use goodwe or goodwe_et if you want modbus control and you know what you're doing.
If you are going to use modbus, following the below (but only if you are not going to use goodwe_int):
- EH owners should select goodwe
- ET and ESA owners should select goodwe_et
When either of goodwe or goodwe_et are selected, a further options box will appear, either GoodWe EH Slot (1-8) or GoodWe ET/ESA Slot (1-4).
- EH and ET owners should select Slot 1 by default
- ESA owners should select Slot 2 by default
If you find that your inverter is not responding to charge and discharge commands, return here and change the slot number to another and try again.
Once your Home Assistant has restarted, continue to configure your system as follows.
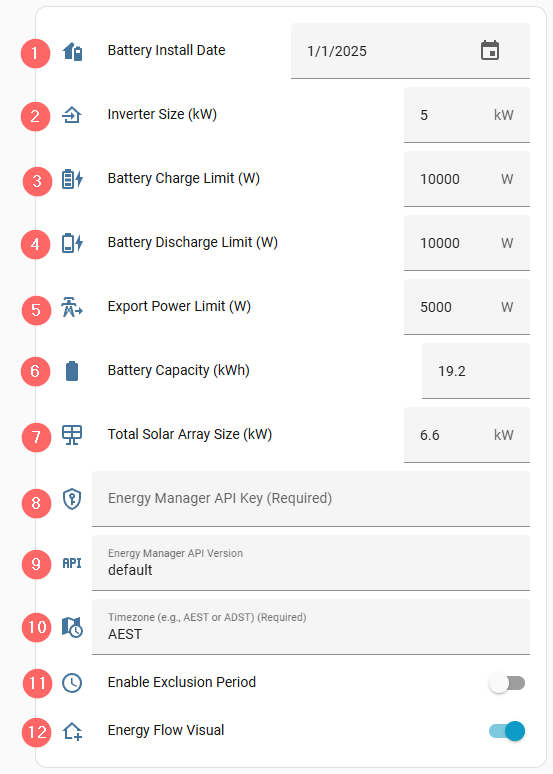
Fill out the following specifics for your solar setup:
- Battery Install Date - Change this to the date that your batteries were installed. Your daily cycles per day entity requires this, so you can keep track of this for warranty purposes (since trading potentially will cycle your batteries more, you will want to make sure you're not too aggressive).
- Inverter Size (kW) - This should be set to the rating of your inverter, measured in kW.
- Battery Charge Limit (W) - This should be set to the charge rating of your battery. This will vary according to stack sizes/number of modules, so refer to your manual or installer for setting. Your battery may not force charge at the appropriate rate if this is configured incorrectly for your system.
Important: Make sure that this value is not higher than your inverter size. - Battery Discharge Limit (W) - This should be set to the discharge rating of your battery. This will vary according to stack sizes/number of modules, so refer to your manual or installer for setting. Your battery may not force discharge at the appropriate rate if this is configured incorrectly for your system.
Important: Make sure that this value is not higher than your inverter size. - Safety - Max Charge - Enter in a figure slightly higher than your battery charge limit. This is a safety feature so that you can't enter a figure greater than what your system can handle, as unusual responses from your inverter may occur if you instruct it to do more than is supported.
- Safety - Max Discharge - Enter in a figure slightly higher than your battery discharge limit. This is a safety feature so that you can't enter a figure greater than what your system can handle, as unusual responses from your inverter may occur if you instruct it to do more than is supported.
- Export Power Limit (kW) - This is the amount that your local electricity distributor (not Amber Electric or LocalVolts) allows you to export (e.g., Energex, Ausgrid, Essential Energy, Citipower, etc.). It will always be at or below your inverter size, but never higher. Typically for a single-phase property this will be 5kW, but this could vary.
- Battery Capacity (kWh) - This is the total capacity of all your batteries.
- Total Solar Array Size (kW) - Enter the total size of all the solar panels on your roof.
- Enable Curtailing - Enable the curtailing switch if you want to stop energy from being exported at negative (or user definable) export prices.
- Dynamic Charging - Toggling this will instruct Energy Manager to limit your charge rate so that full battery SoC is obtained closer to the end of the day, so that it aims to limit wear & tear on your system.
- Allow charge rate % - If you do not want to allow your system to charge at full rate ever, change this percentage appropriately.
- Allow discharge rate % - If you do not want to allow your system to discharge at full rate ever, change this percentage appropriately.
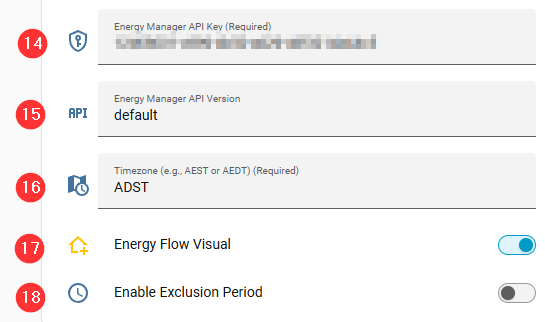
- Energy Manager API Key - Enter your free API key here. This is obtained from the subscriptions menu once you have registered and logged into this website.
- Energy Manager API Version - Keep this as "default" unless you are instructed otherwise.
- Timezone - Enter your timezone. Choose from AEST, AEDT, ACST, ACWST. Note that WA and NT are not supported due to separate electricity grids. If you reside in a location that has daylight savings time at some stage during the year, set it as the daylight savings time zone, not as AEST.
- Energy Flow Visual - Toggle the energy flow visual on the top right of the main PV page on or off, depending on whether you want to view it or not.
- Enable Exclusion Period - Enable this if you wish to have a set daily time when energy management is disabled automatically. This will force electricity to be drawn from the grid (not the battery) so you can charge your electric vehicle during a cheaper period of time.